
Week Eight
- Dec 7, 2015
- 3 min read
With week eight comes the more practical side of my sentry gun's realisation - it's finally time to model its phyical form! This Monday Mike Pickton taught us how to bake down the normals from our high-res models to the ones with the 7500 triangle budget, doing so with the use of a quickfire tutorial. We were given an image of a 50's television, which we then replicated in 3DS Max, using around 700 triangles. After this, we were free to create a similar model with a much higher level of detail, meaning that we could include all the buttons, knobs and panels in all their cylindrical glory! After unwrapping the low-res model's UV's, Mike then showed us how to use the projection modifier, with both models in the scene. The results were generally mixed among the class, but to be fair it was too much of a complex process for anyone to nail the very first time. Once fully learned, this process will likely become envaluable later in the project as we strive to enhance the visual fidelity of our sentry gun models.
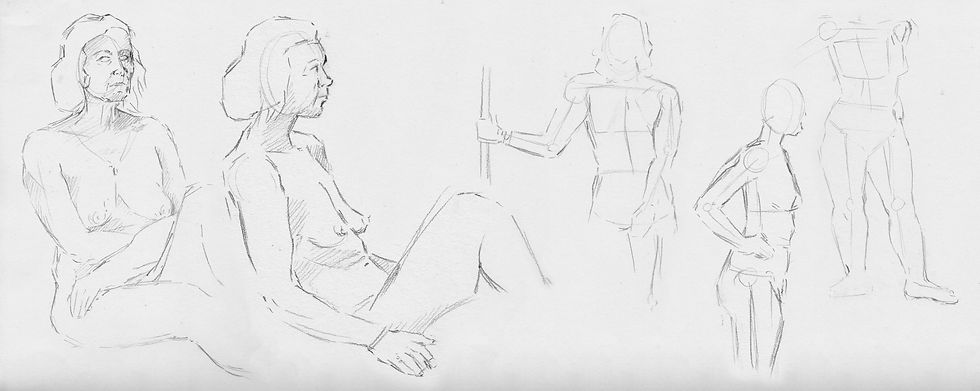
This Monday work continued with the blocked-out skeletal framework which we had based our drawings on the previous week. Last week I remarked at how this process had helped me to assemble the body at a quicker pace, and though I do stand by that I believe that some of the more half-finished sketches don't really do a good job, as there isn't really enough there to simulate the figure well enough. In the third image from the left, for example, the model is standing with her back to me, but that doesn;t come across to the viewer instantly as it should. When I look at it, at least, my eyes see the model facing forward with her right arm in an awkward, unnatural position. The last image alright, however I may have made the entire figure slightly too wide in the lower half.
As for the two more polished sketches on the right, things have gone a lot better - the second one especially. I really enjoy darwing the figure from and almost perfectly side-on angle, as it means I can capture the profile of the the face and it makes certain shapes clearer to identify. Though I haven't completed the subject in either peice, I usually choose to opt for a bit of shading in the final 30 seconds, as I strongly believe that even the smallest use of it can make a good drawing a great one.
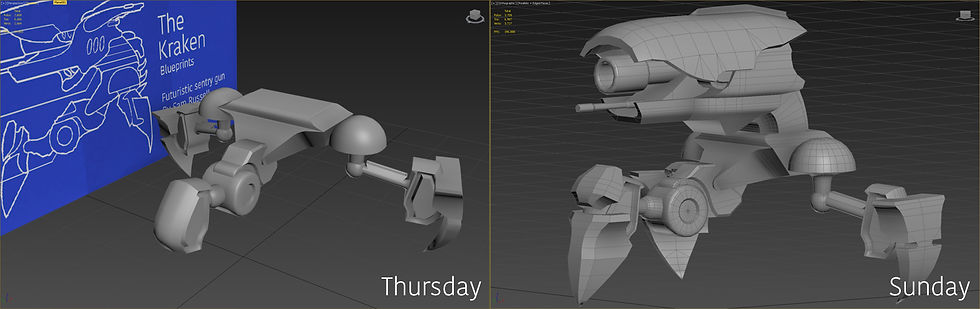
Here's how far I've managed to get with the Kraken's model - not bad, eh? Unfortunately this is one of those weeks where there's not much to showcase on the blog as I have spent the majority of the week working exclusively on one thing - in this case, this model. As you can see from the screenshot on the left, I used my blueprints from last week as a reference plane for the side view of the turret, but I had no form of such reference for the front or back, which is kind of a good thing - as long as the model matched the side view in my blueprints, I could pretty much just tinker around with all the widths and such and make up the front-facing details on the go. I did change a few already established features along the way, though - you may notice that the feet and lower legs have had a slight facelift, primarily due to the fact that the shapes presented in the blueprints were a bit to vague to physically realise in 3DS Max. Still, they're not a million miles away from the original look.
The model currently stands at around 4000 triangles, but there's only a few more details to add now, such as the tubes towards the back of the barrel and the handle-like thing on the underside of the body. Along with optimisation, all should be done by the end of next week.
Comments